Construction of the benchwork begins this Labor day long week-end. The forecast calls for rain all week-end so it's a perfect excuse to stay indoors and work on the train layout. In total, there are four modular sections. The layout is composed of a station, platform, reducer and bridge section. I elected to combine the interchange with the bridge to shorten the already lengthy layout. Doing so gave me more space to add the station extension, which is what I assembled today.
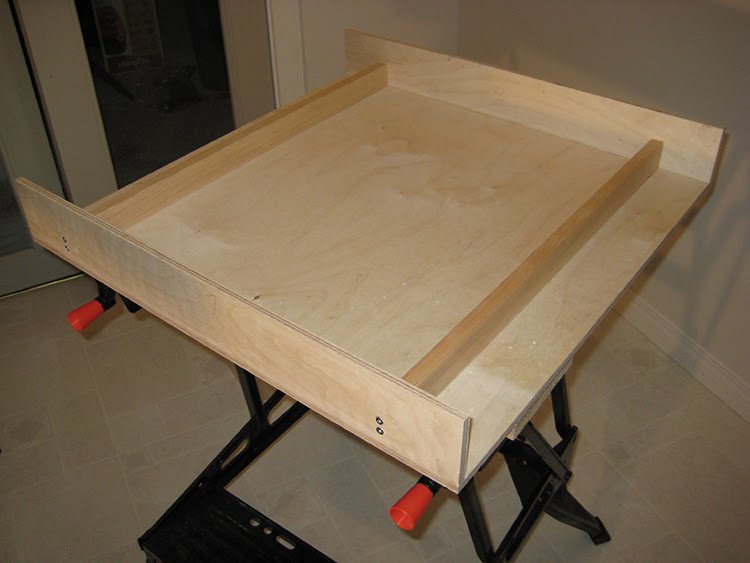
There are only end walls where the tables connect. I excluded the side walls so that the entire layout would look like it was on a thin shelf. It's a little difficult to explain what I am doing here, but I wanted it to appear that the entire layout was one thin sheet of plywood. Where the tables join, I will have some sort of table leg-connector, which will conceal the edge of the end wall. I haven't fully vetted out how this will be done, but I'll post pictures when I've sorted it out in my mind. It may be a while. I tend to over think things too much. Worse case scenario, I can always put on side walls if my plans don't work out. I'd like to avoid that as much as possible because it would require me to bend wood for the reducer section. Something I am loathe to attempt with my novice woodworking skills. It took me all afternoon to finish assembling the section for the station module.
 In the photograph on the left, you can see the extensive use of clamps. I have to say they were indispensable as I glued the end walls to the bottom of the table top. I'm glad I picked up all these clamps when I started this layout. Although I appreciate the quick release of the Irwin clamps, they're not as sturdy nor as strong as a typical C style clamp with the threaded bolt. The Irwin pinch clamps are even weaker. I don't think they sell them anymore. The spring clamps have a tighter hold than the pinch clamps.
 This photograph shows a close up of the 90 degree assembly braces. I bought the braces from Lee Valley specifically for this job. They were a bit expensive, but worth it! With the clamps, the braces definitely helped to keep things properly aligned while the glue set. As I said before, it pays to have the right tools for the job.
 Just as a precaution, I hammered in nails to make sure the pieces would not separate. I first drilled a small hole to prevent the plywood from splitting as it is only 3/8" thick. Angling the nails will ensure the two pieces do not lift apart. By the way, the strips are only 3" wide. I wasn't expecting the tables to bear a lot of weight so I felt this width was more than adequate. I had these cut at Windsor Plywood as I do not have a table saw. It was well worth the shop fee to have them cut the plywood for me.
 Lastly, I attached two 1" x 2" fir strips under the table top to prevent sagging. It took me all afternoon to assemble the station module. I'm expecting the other modules to go much faster now that I've sorted out the details. Hopefully I'll be able to post a picture of all the modules completed after this long week-end. Fingers crossed.
No comments:
Post a Comment